Unlike VMware work station, Virtualbox, ESXi is a bare-metal hyper-visor, which means you don't need an operating system before you can install ESXi.
This blog article shows how I installed ESXi 5.1. The installation process is quite straight forward, and is quite similar to typical Linux installation.
There is no spare physical computer for me to test the installation, so I created a VM in my Virtualbox, from Virtualbox I installed ESXi.
1. First we need to download ESXi from VMware website, the one I downloaded is: VMware-VMvisor-Installer-5.1.0-799733.x86_64.iso
2. Start machine with the iso downloaded in step 1.
3. After ESXi installer loaded some stuffs, we are greeted with this welcome screen and End User License Agreement (EULA).
4. Select the disk to install ESXi.
5. Choose keyboard layout
6. Set root password
7. Installation started.
8. Installation completed.
9. Hit Enter to reboot ESXi, after rebooting, we are given this screen.
10. Open web browser, key in the URL given in step 9. Click "Download vSpere Client" to install vSphere Client on our windows machine.
11. Launch vSpere Client, key in the IP adress, username, and password.
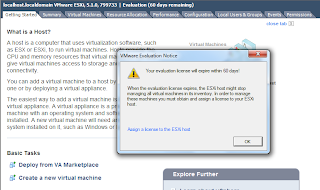
12. After logging in, a message popup displaying "Your evaluation license will expire in 60 days", for the time being just ignore it first.
We can create or manage VMs on ESXi remotely now!
13. Once we login vSphere Client, we can create and manage our virtual machines. In http://linuxscripter.blogspot.sg/2013/04/esxi-how-to-install-virtual-machine.html, I will demo how to create VM and install guest OS.


Share great information about your blog , Blog really helpful for us . We read your blog , share most useful information in blog . Thanks for share your blog here .vSphere 6 Essentials Plus Kit for 3 hosts
ReplyDelete